Wednesday, 4 May 2016

How to Resolve ORA-01102: cannot mount database in EXCLUSIVE mode

SQL> startup
ORACLE instance started.
Total System Global Area  830930944 bytes
Fixed Size                  2257800 bytes
Variable Size             536874104 bytes
Database Buffers          285212672 bytes
Redo Buffers                6586368 bytes
ORA-01102: cannot mount database in EXCLUSIVE mode

Step -01

[oracle@machine1 trace]$ vi alert_orcl.log
sculkget: lock held by PID: 13269
ORA-09968: unable to lock file
Linux-x86_64 Error: 11: Resource temporarily unavailable
Additional information: 13269
ORA-1102 signalled during: ALTER DATABASE MOUNT...

Step-02

[oracle@machine1 trace]$ ps -ef | grep pmon
oracle 10222 1 0 10:27 ? 00:00:00 ora_pmon_ORCL
oracle 2522 1 0 Aug11 ? 00:00:06 ora_pmon_orcl

Step-03

[oracle@machine1 trace]$  Kill -9 10222 2522

Step-04

[oracle@machine1 trace]$ export ORACLE_SID= orcl

[oracle@machine1 ~]$ sqlplus / as sysdba
SQL*Plus: Release 11.2.0.4.0 Production on Wed May 4 14:03:18 2016
Copyright (c) 1982, 2013, Oracle.  All rights reserved.
Connected to:
Oracle Database 11g Enterprise Edition Release 11.2.0.4.0 - 64bit Production
With the Partitioning, OLAP, Data Mining and Real Application Testing options

SQL> startup

ORACLE instance started.
Total System Global Area  830930944 bytes
Fixed Size                  2257800 bytes
Variable Size             536874104 bytes
Database Buffers          285212672 bytes
Redo Buffers                6586368 bytes
Database mounted.
Database opened.
SQL>
Resolving Gaps in Data Guard Apply Using Incremental RMAN BAckup

Recently, we had a glitch on a Data Guard (physical standby database) on infrastructure. This is not a critical database; so the monitoring was relatively lax. And that being done by an outsourcer does not help it either. In any case, the laxness resulted in a failure remaining undetected for quite some time and it was eventually discovered only when the customer complained. This standby database is usually opened for read only access from time to time.This time, however, the customer saw that the data was significantly out of sync with primary and raised a red flag. Unfortunately, at this time it had become a rather political issue.

Since the DBA in charge couldn’t resolve the problem, I was called in. In this post, I will describe the issue and how it was resolved. In summary, there are two parts of the problem:

(1) What happened
(2) How to fix it

What Happened

Let’s look at the first question – what caused the standby to lag behind. First, I looked for the current SCN numbers of the primary and standby databases. On the primary:

SQL> select current_scn from v$database;

CURRENT_SCN
-----------
1447102

On the standby:

SQL> select current_scn from v$database;

CURRENT_SCN
-----------
1301571

Clearly there is a difference. But this by itself does not indicate a problem; since the standby is expected to lag behind the primary (this is an asynchronous non-real time apply setup). The real question is how much it is lagging in the terms of wall clock. To know that I used the scn_to_timestamp function to translate the SCN to a timestamp:

SQL> select scn_to_timestamp(1447102) from dual;

SCN_TO_TIMESTAMP(1447102)
-------------------------------
18-DEC-09 08.54.28.000000000 AM

I ran the same query to know the timestamp associated with the SCN of the standby database as well (note, I ran it on the primary database, though; since it will fail in the standby in a mounted mode):

SQL> select scn_to_timestamp(1301571) from dual;

SCN_TO_TIMESTAMP(1301571)
-------------------------------
15-DEC-09 07.19.27.000000000 PM

This shows that the standby is two and half days lagging! The data at this point is not just stale; it must be rotten.

The next question is why it would be lagging so far back in the past. This is a 10.2 database where FAL server should automatically resolved any gaps in archived logs. Something must have happened that caused the FAL (fetch archived log) process to fail. To get that answer, first, I checked the alert log of the standby instance. I found these lines that showed the issue clearly:


Fri Dec 18 06:12:26 2009
Waiting for all non-current ORLs to be archived...
Media Recovery Waiting for thread 1 sequence 700
Fetching gap sequence in thread 1, gap sequence 700-700
… 
Fri Dec 18 06:13:27 2009
FAL[client]: Failed to request gap sequence
GAP - thread 1 sequence 700-700
DBID 846390698 branch 697108460
FAL[client]: All defined FAL servers have been attempted.

Going back in the alert log, I found these lines:

Tue Dec 15 17:16:15 2009
Fetching gap sequence in thread 1, gap sequence 700-700
Error 12514 received logging on to the standby
FAL[client, MRP0]: Error 12514 connecting to DEL1 for fetching gap sequence
Tue Dec 15 17:16:15 2009
Errors in file /opt/oracle/admin/DEL2/bdump/del2_mrp0_18308.trc:
ORA-12514: TNS:listener does not currently know of service requested in connect descriptor
Tue Dec 15 17:16:45 2009
Error 12514 received logging on to the standby
FAL[client, MRP0]: Error 12514 connecting to DEL1 for fetching gap sequence
Tue Dec 15 17:16:45 2009
Errors in file /opt/oracle/admin/DEL2/bdump/del2_mrp0_18308.trc:
ORA-12514: TNS:listener does not currently know of service requested in connect descriptor

This clearly showed the issue. On December 15th at 17:16:15, the Managed Recovery Process encountered an error while receiving the log information from the primary. The error was ORA-12514 “TNS:listener does not currently know of service requested in connect descriptor”. This is usually the case when the TNS connect string is incorrectly specified. The primary is called DEL1 and there is a connect string called DEL1 in the standby server.

The connect string works well. Actually, right now there is no issue with the standby getting the archived logs; so there connect string is fine - now. The standby is receiving log information from the primary. There must have been some temporary hiccups causing that specific archived log not to travel to the standby. If that log was somehow skipped (could be an intermittent problem), then it should have been picked by the FAL process later on; but that never happened. Since the sequence# 700 was not applied, none of the logs received later – 701, 702 and so on – were applied either. This has caused the standby to lag behind since that time.

So, the fundamental question was why FAL did not fetch the archived log sequence# 700 from the primary. To get to that, I looked into the alert log of the primary instance. The following lines were of interest:


Tue Dec 15 19:19:58 2009
Thread 1 advanced to log sequence 701 (LGWR switch)
Current log# 2 seq# 701 mem# 0: /u01/oradata/DEL1/onlinelog/o1_mf_2_5bhbkg92_.log
Tue Dec 15 19:20:29 2009Errors in file /opt/oracle/product/10gR2/db1/admin/DEL1/bdump/del1_arc1_14469.trc:
ORA-00308: cannot open archived log '/u01/oraback/1_700_697108460.dbf'
ORA-27037: unable to obtain file status
Linux Error: 2: No such file or directory
Additional information: 3
Tue Dec 15 19:20:29 2009
FAL[server, ARC1]: FAL archive failed, see trace file.
Tue Dec 15 19:20:29 2009
Errors in file /opt/oracle/product/10gR2/db1/admin/DEL1/bdump/del1_arc1_14469.trc:
ORA-16055: FAL request rejected
ARCH: FAL archive failed.
Archiver continuing
Tue Dec 15 19:20:29 2009
ORACLE Instance DEL1 - Archival Error. Archiver continuing.

These lines showed everything clearly. The issue was:

ORA-00308: cannot open archived log '/u01/oraback/1_700_697108460.dbf'
ORA-27037: unable to obtain file status
Linux Error: 2: No such file or directory


The archived log simply was not available. The process could not see the file and couldn’t get it across to the standby site.

Upon further investigation I found that the DBA actually removed the archived logs to make some room in the filesystem without realizing that his action has removed the most current one which was yet to be transmitted to the remote site. The mystery surrounding why the FAL did not get that log was finally cleared.

Solution

Now that I know the cause, the focus was now on the resolution. If the archived log sequence# 700 was available on the primary, I could have easily copied it over to the standby, registered the log file and let the managed recovery process pick it up. But unfortunately, the file was gone and I couldn’t just recreate the file. Until that logfile was applied, the recovery will not move forward. So, what are my options?

One option is of course to recreate the standby - possible one but not technically feasible considering the time required. The other option is to apply the incremental backup of primary from that SCN number. That’s the key – the backup must be from a specific SCN number. I have described the process since it is not very obvious. The following shows the step by step approach for resolving this problem. I have shown where the actions must be performed – [Standby] or [Primary].

1. [Standby] Stop the managed standby apply process:

SQL> alter database recover managed standby database cancel;

Database altered.

2. [Standby] Shutdown the standby database

3. [Primary] On the primary, take an incremental backup from the SCN number where the standby has been stuck:

RMAN> run { 
2> allocate channel c1 type disk format '/u01/oraback/%U.rmb'; 
3> backup incremental from scn 1301571 database;
4> }


using target database control file instead of recovery catalog
allocated channel: c1
channel c1: sid=139 devtype=DISK

Starting backup at 18-DEC-09
channel c1: starting full datafile backupset
channel c1: specifying datafile(s) in backupset
input datafile fno=00001 name=/u01/oradata/DEL1/datafile/o1_mf_system_5bhbh59c_.dbf
… 
piece handle=/u01/oraback/06l16u1q_1_1.rmb tag=TAG20091218T083619 comment=NONE
channel c1: backup set complete, elapsed time: 00:00:06
Finished backup at 18-DEC-09
released channel: c1

4. [Primary] On the primary, create a new standby controlfile:

SQL> alter database create standby controlfile as '/u01/oraback/DEL1_standby.ctl';

Database altered.

5. [Primary] Copy these files to standby host:

oracle@oradba1 /u01/oraback# scp *.rmb *.ctl oracle@oradba2:/u01/oraback
oracle@oradba2's password:
06l16u1q_1_1.rmb 100% 43MB 10.7MB/s 00:04
DEL1_standby.ctl 100% 43MB 10.7MB/s 00:04 

6. [Standby] Bring up the instance in nomount mode:

SQL> startup nomount

7. [Standby] Check the location of the controlfile:

SQL> show parameter control_files

NAME TYPE VALUE
------------------------------------ ----------- -------------
control_files string /u01/oradata/standby_cntfile.ctl

8. [Standby] Replace the controlfile with the one you just created in primary.

9. $ cp /u01/oraback/DEL1_standby.ctl /u01/oradata/standby_cntfile.ctl
10.[Standby] Mount the standby database:

SQL> alter database mount standby database;
11.[Standby] RMAN does not know about these files yet; so you must let it know – by a process called cataloging. Catalog these files:

$ rman target=/

Recovery Manager: Release 10.2.0.4.0 - Production on Fri Dec 18 06:44:25 2009

Copyright (c) 1982, 2007, Oracle. All rights reserved.

connected to target database: DEL1 (DBID=846390698, not open)
RMAN> catalog start with '/u01/oraback';

using target database control file instead of recovery catalog
searching for all files that match the pattern /u01/oraback

List of Files Unknown to the Database
=====================================
File Name: /u01/oraback/DEL1_standby.ctl
File Name: /u01/oraback/06l16u1q_1_1.rmb

Do you really want to catalog the above files (enter YES or NO)? yes
cataloging files...
cataloging done

List of Cataloged Files
=======================
File Name: /u01/oraback/DEL1_standby.ctl
File Name: /u01/oraback/06l16u1q_1_1.rmb

12.Recover these files:

RMAN> recover database;

Starting recover at 18-DEC-09
using channel ORA_DISK_1
channel ORA_DISK_1: starting incremental datafile backupset restore
channel ORA_DISK_1: specifying datafile(s) to restore from backup set
destination for restore of datafile 00001: /u01/oradata/DEL2/datafile/o1_mf_system_5lptww3f_.dbf
...
channel ORA_DISK_1: reading from backup piece /u01/oraback/05l16u03_1_1.rmb
channel ORA_DISK_1: restored backup piece 1
piece handle=/u01/oraback/05l16u03_1_1.rmb tag=TAG20091218T083619
channel ORA_DISK_1: restore complete, elapsed time: 00:00:07

starting media recovery

archive log thread 1 sequence 8012 is already on disk as file /u01/oradata/1_8012_697108460.dbf
archive log thread 1 sequence 8013 is already on disk as file /u01/oradata/1_8013_697108460.dbf
… 

13. After some time, the recovery fails with the message:

archive log filename=/u01/oradata/1_8008_697108460.dbf thread=1 sequence=8009
RMAN-00571: ===========================================================
RMAN-00569: =============== ERROR MESSAGE STACK FOLLOWS ===============
RMAN-00571: ===========================================================
RMAN-03002: failure of recover command at 12/18/2009 06:53:02
RMAN-11003: failure during parse/execution of SQL statement: alter database recover logfile '/u01/oradata/1_8008_697108460.dbf'
ORA-00310: archived log contains sequence 8008; sequence 8009 required
ORA-00334: archived log: '/u01/oradata/1_8008_697108460.dbf'

This happens because we have come to the last of the archived logs. The expected archived log with sequence# 8008 has not been generated yet.

14.At this point exit RMAN and start managed recovery process:

SQL> alter database recover managed standby database disconnect from session;

Database altered.

15.Check the SCN’s in primary and standby:

[Standby] SQL> select current_scn from v$database;

CURRENT_SCN
-----------
1447474
[Primary] SQL> select current_scn from v$database;

CURRENT_SCN
-----------
1447478
Now they are very close to each other. The standby has now caught up.


Content from http://hemora.blogspot.com/2012_12_01_archive.html

Oracle Linux 6 Installation Step by Step Guide

This article provides a pictorial guide for performing a default installation of Oracle Linux 6.

Basic Installation

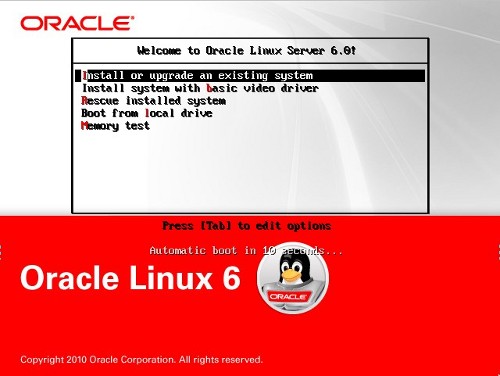
  1. Boot from the DVD. At the boot screen, press the "Enter" key.
    Boot
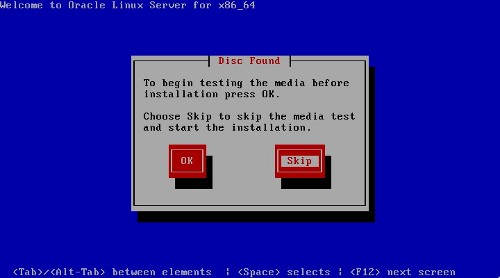
  2. Press the "tab" key to move focus to the "Skip" key, then press the "Enter" key to continue.
    Test Media
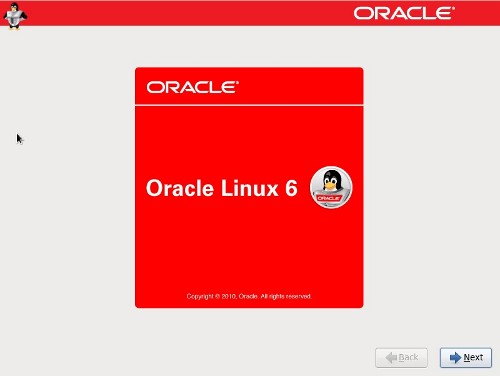
  3. On the "Welcome" screen, click the "Next" button.
    Welcome
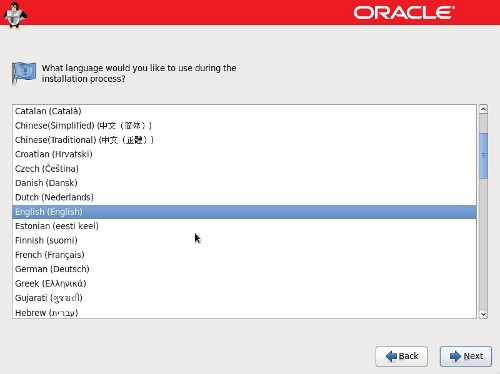
  4. Select the appropriate language, then click the "Next" button.
    Language
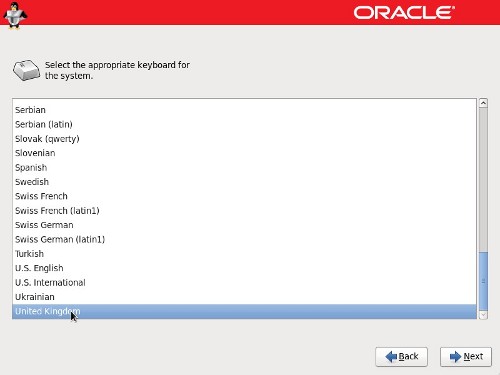
  5. Select the relevant keyboard setting, then click the "Next" button.
    Keyboard
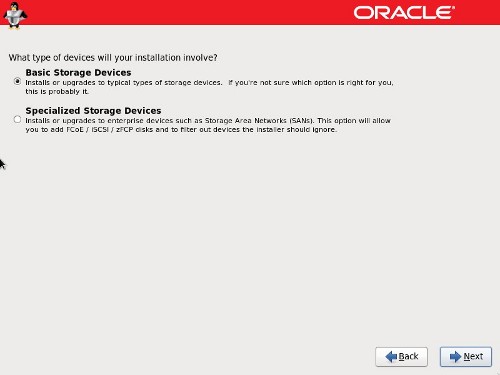
  6. Select the storage option necessary for the installation, then click the "Next" button.
    Storage
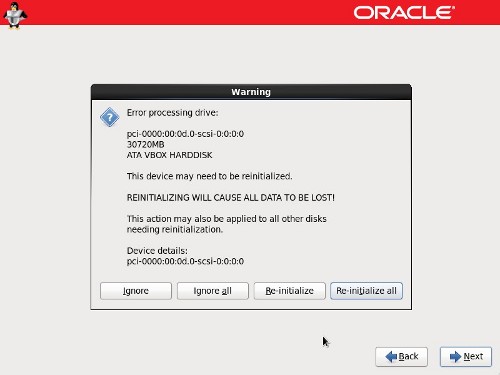
  7. Click the "Re-initialize all" button on the disk initialization warning dialog.
    Disk Partitioning Warning
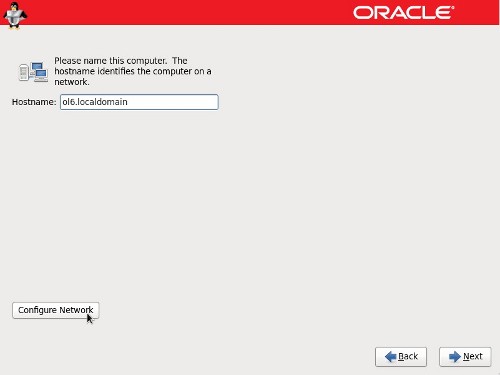
  8. Enter a fully qualified host name, then click the "Configure Network" button.
    Hostname
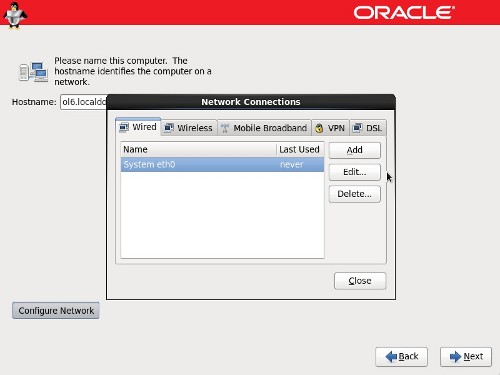
  9. Highlight the relevant connection and click the "Edit" button.
    Network Connection
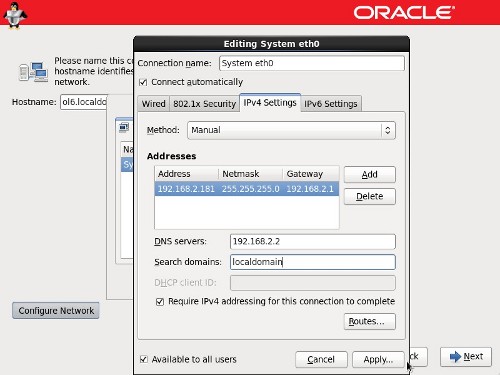
  10. Check the "Connect automatically" checkbox. If you are not using DHCP, click on the "IPv4 Settings" tab, set the method to "Manual", click the "Add" button and enter the appropriate network details. When you are happy with the details, click the "Apply" and "Close" buttons to return to the host name screen, then click the "Forward" button.
    Editing System eth0
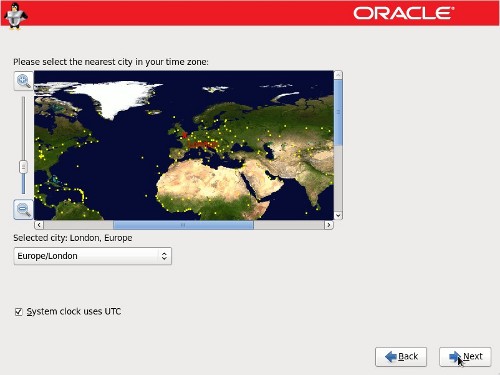
  11. Select the relevant time zone by clicking on your nearest city on the map. Click on the "Next" button to proceed.
    Time Zone
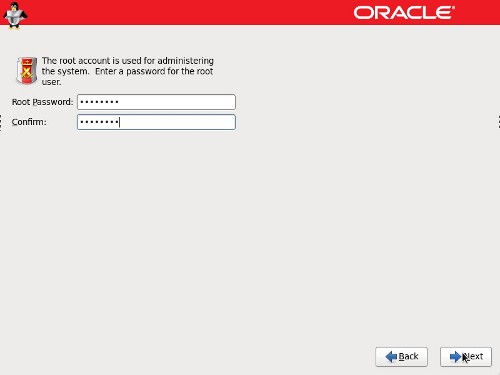
  12. Enter a root password for the server, then click the "Next" button to proceed.
    Root Password
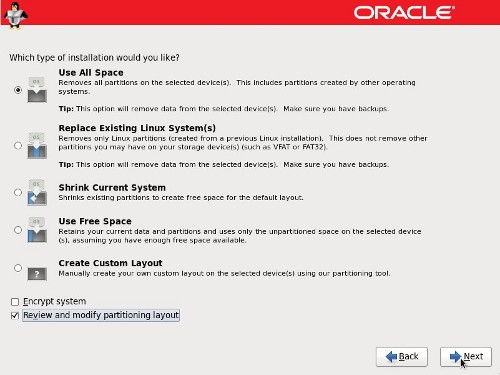
  13. Check the partitioning type you require. If you want to amend the default partitioning layout, check the "Review and modify partitioning layout" option. Click the "Next" button.
    Disk Partitioning
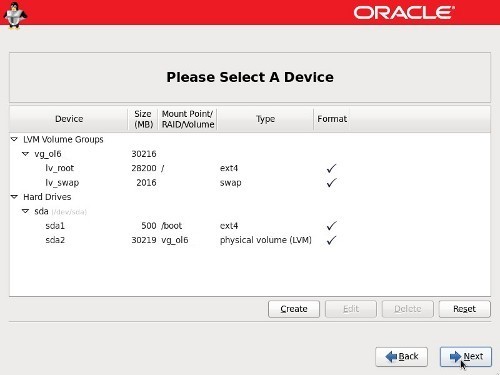
  14. The installer will list the default partitioning scheme for your size disk. Amend them as required and click the "Next" button, then the "Format" and "Write changes to disk" buttons on the following dialogs.
    Disk Setup
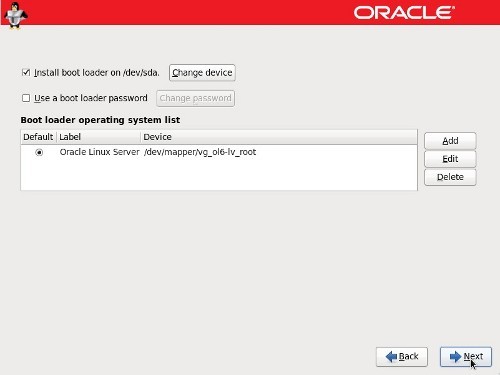
  15. Accept the boot loader settings by clicking the "Next" button.
    Boot Loader
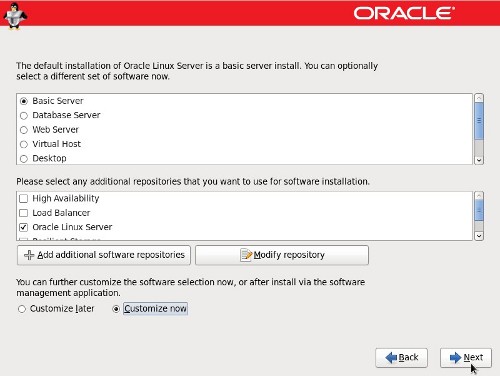
  16. Accept the "Basic Server" installation and check the "Customize now" option, then click the "Next" button.
    Package Installation Defaults
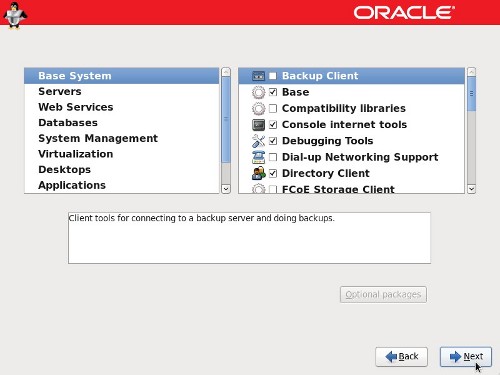
  17. The "Package Group Selection" screen allows you to select the required package groups, and individual packages within the details section. When you've made your selection, click the "Next" button. If you want the server to have a regular gnome desktop you need to include the following package groups from the "Desktops" section:
    • Desktops
    • Desktop
    • Desktop Platform
    • Fonts
    • General Purpose Desktop
    • Graphical Administration Tools
    • X Windows System
    Package Group Selection
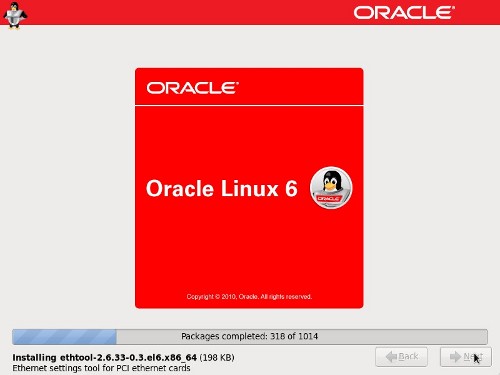
  18. Wait for the installation to complete.
    Installing Packages
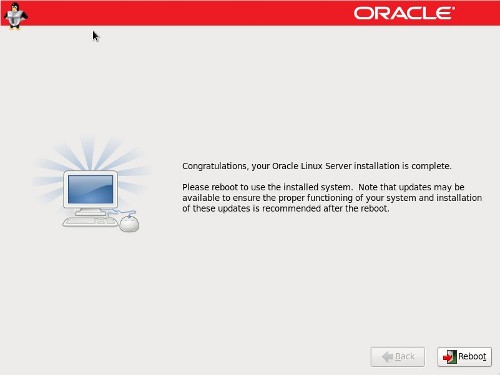
  19. Click the "Reboot" button to complete the installation.
    Congratulations
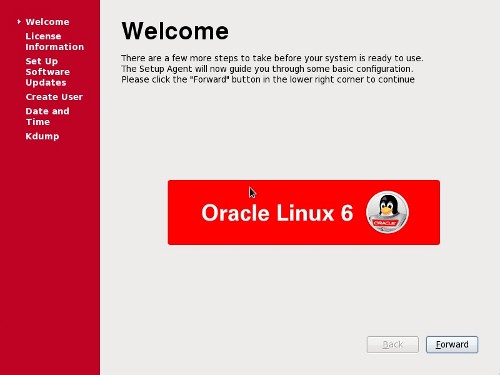
  20. On the "Welcome" screen, click the "Forward" button.
    Welcome
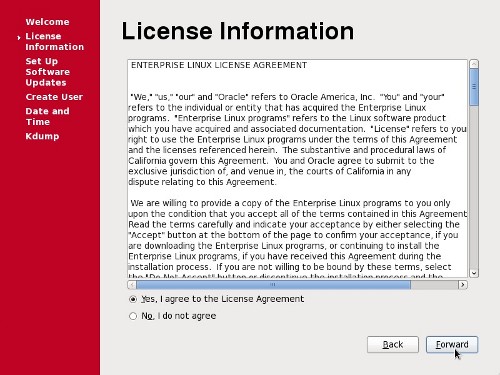
  21. Accept the license agreement and click the "Forward" button.
    License Agreement
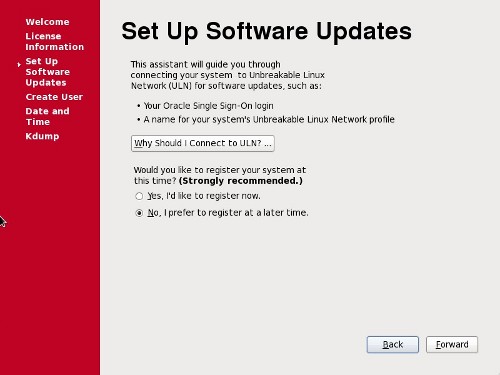
  22. Pick the desired ULN Registration option, then click the "Forward" button. In this case we will pick the register later option.
    Software Updates
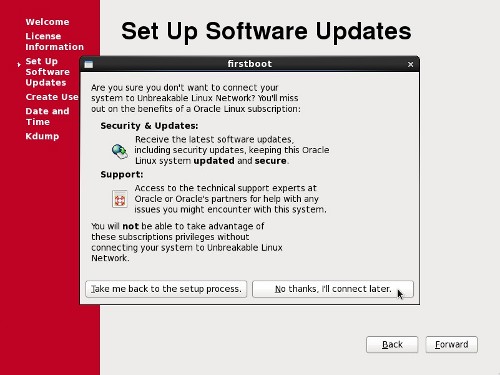
  23. Click the "No thanks, I'll connect later." button.
    Software Updates Confirm
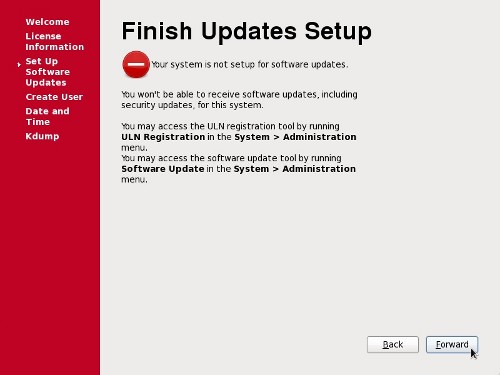
  24. Finish the software updates setup by clicking the "Forward" button.
    Software Updates Finish
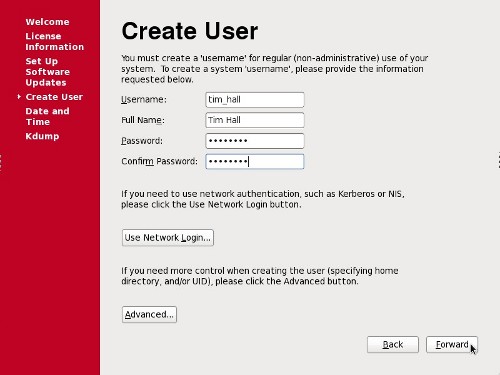
  25. Enter the details for system user, then click the "Forward" button.
    System User
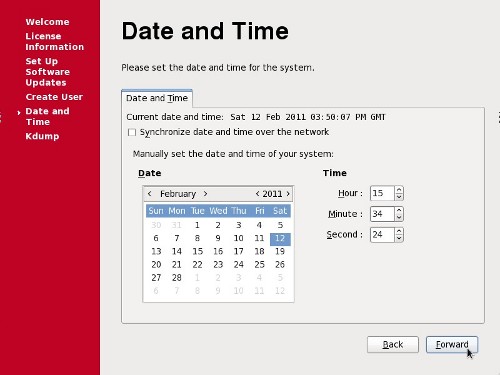
  26. Adjust the Date and Time settings if necessary, and click the "Forward" Button.
    Date Time
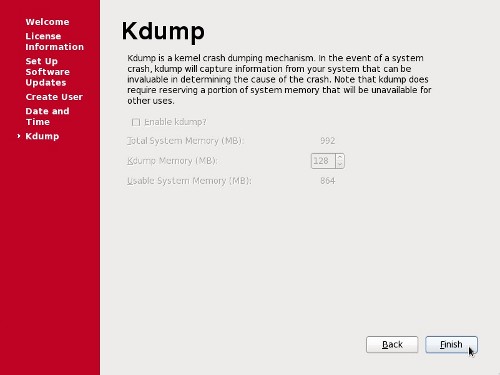
  27. Accept the default setting on the Kdump screen by clicking the "Finish" button.
    Kdump
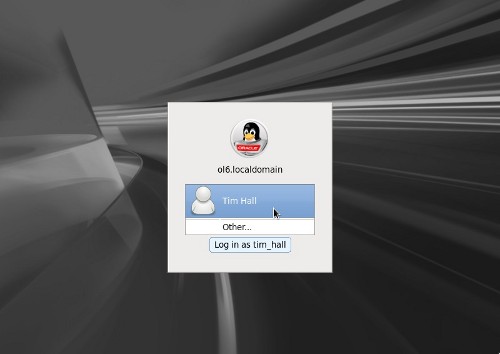
  28. Next, you are presented with the login screen. Log in by clicking on the user on the login screen.
    Login
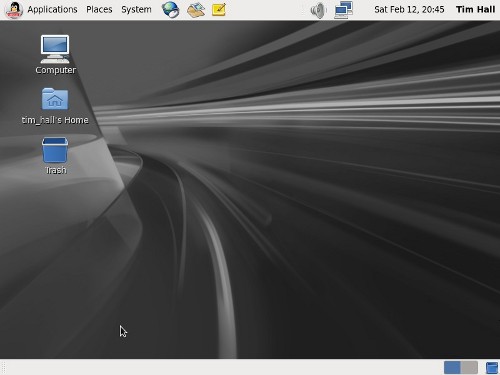
  29. Once logged in, you are ready to use the desktop.
    Desktop

Firewall

To turn off the firewall do the following as the "root" user.
# service iptables stop
# chkconfig iptables off
Alternatively, use the GUI by doing the following.
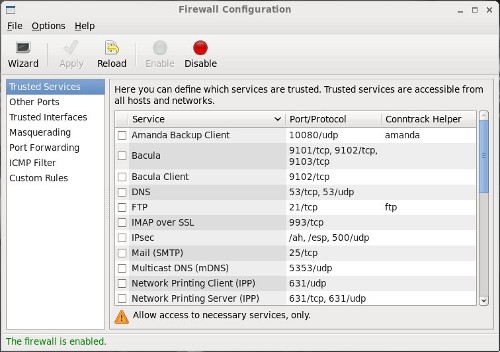
  1. Open the "Firewall Configuration" dialog (System > Administration > Firewall).
  2. Click the "Close" button on the startup dialog and type in the "root" password if requested.
  3. On the resulting dialog, click the "Disable" button, followed by the "Apply" button on the toolbar.
    Firewall
  4. Click the "Yes" button on the confirmation dialog.
  5. Quit the "Firewall Configuration" dialog.

SELinux

Set SELinux to "permissive" by editing the "/etc/selinux/config" file, making sure the SELINUX flag is set as follows.
SELINUX=permissive
Once the change is complete, either restart the server or run the following command as "root".

# setenforce Permissive

Tuesday, 3 May 2016

Find out APPS/SYSADMIN password in Oracle Apps R12 if you lost or forgotten

Step to Find APPS PASSWORD :

Step #1


sqlplus> sqlplus system/system_password
sqlplus / as sysdba

Step#2: Create Function to decrypt the encrypted password

SQL> create FUNCTION apps.decrypt_pin_func(in_chr_key IN VARCHAR2,in_chr_encrypted_pin IN VARCHAR2) RETURN VARCHAR2 AS LANGUAGE JAVA NAME 'oracle.apps.fnd.security.WebSessionManagerProc.decrypt(java.lang.String,java.lang.String) return java.lang.String';
/
Function created.
Step#3: Query for password
set line size 200 long 300
SQL> select ENCRYPTED_FOUNDATION_PASSWORD from apps.fnd_user where USER_NAME='GUEST';

ENCRYPTED_FOUNDATION_PASSWORD
--------------------------------------------------------------------------------
ZG379C5C883FF56235BE975D075A6FD2E7A749279B7BFCE331530B443E86F41A1966E3E4B1864519DB88BC07D58666AD837B

Step#4: Get the Apps password using encrypted guest password
SQL> SELECT apps.decrypt_pin_func('GUEST/ORACLE','ZG379C5C883FF56235BE975D075A6FD2E7A749279B7BFCE331530B443E86F41A1966E3E4B1864519DB88BC07D58666AD837B') from dual;

APPS.DECRYPT_PIN_FUNC('GUEST/ORACLE','ZG379C5C883FF56235BE975D075A6FD2E7A749279B
--------------------------------------------------------------------------------
APPS123
Step#5: Test apps password
SQL> conn apps/APPS123;
Connected.

Step to Find SYSADMIN PASSWORD :
Step# 1:
SQL> conn apps/APPS123;

Connected.

Step#2:
SQL> CREATE OR REPLACE PACKAGE get_pwd AS
FUNCTION decrypt (KEY IN VARCHAR2, VALUE IN VARCHAR2)
RETURN VARCHAR2;
END get_pwd;
/

Package created.

Step# 3:
SQL>
CREATE OR REPLACE PACKAGE BODY get_pwd AS
FUNCTION decrypt (KEY IN VARCHAR2, VALUE IN VARCHAR2)
RETURN VARCHAR2
AS LANGUAGE JAVA NAME 'oracle.apps.fnd.security.WebSessionManagerProc.decrypt(java.lang.String,java.lang.String) return java.lang.String'; END get_pwd;
/

Package body created.

Step# 4:
SQL> SELECT usr.user_name,get_pwd.decrypt ((SELECT (SELECT get_pwd.decrypt
  (fnd_web_sec.get_guest_username_pwd, usertable.encrypted_foundation_password
  )FROM DUAL) AS apps_password FROM fnd_user usertable WHERE usertable.user_name =(SELECT SUBSTR(fnd_web_sec.get_guest_username_pwd,1, INSTR(fnd_web_sec.get_guest_username_p '/') - 1)
FROM DUAL)), usr.encrypted_user_password) PASSWORD FROM fnd_user usr WHERE usr.user_name = '&USER_NAME';
Enter value for user_name: SYSADMIN

old  23:  WHERE usr.user_name = '&USER_NAME'
new  23:  WHERE usr.user_name = 'SYSADMIN'
------------------------ -----------------
SYSADMIN SYSADMIN123

Step#5 : Bellow sql will help you to validate SYSADMIN Password
SQL> select fnd_web_sec.validate_login('SYSADMIN','SYSADMIN123) from dual;
FND_WEB_SEC.VALIDATE_LOGIN('SYSADMIN','SYSADMIN123')

--------------------------------------------------------------------------------
Y

Oracle User info using Process ID

set serveroutput on size 50000
set echo off feed off veri off
accept 1 prompt 'Enter Unix process id: '

DECLARE
  v_sid number;
  s sys.v_$session%ROWTYPE;
  p sys.v_$process%ROWTYPE;
BEGIN
  begin
    select sid into v_sid
    from   sys.v_$process p, sys.v_$session s
    where  p.addr     = s.paddr
      and  (p.spid    = &&1
       or   s.process = '&&1');
  exception
    when no_data_found then
      dbms_output.put_line('Unable to find process id &&1!!!');
      return;
    when others then
      dbms_output.put_line(sqlerrm);
      return;
  end;

  select * into s from sys.v_$session where sid  = v_sid;
  select * into p from sys.v_$process where addr = s.paddr;

  dbms_output.put_line('==================================================');
  dbms_output.put_line('SID/Serial  : '|| s.sid||','||s.serial#);
  dbms_output.put_line('Foreground  : '|| 'PID: '||s.process||' - '||s.program);
  dbms_output.put_line('Shadow      : '|| 'PID: '||p.spid||' - '||p.program);
  dbms_output.put_line('Terminal    : '|| s.terminal || '/ ' || p.terminal);
  dbms_output.put_line('OS User     : '|| s.osuser||' on '||s.machine);
  dbms_output.put_line('Ora User    : '|| s.username);
  dbms_output.put_line('Status Flags: '|| s.status||' '||s.server||' '||s.type);
  dbms_output.put_line('Tran Active : '|| nvl(s.taddr,'NONE'));
  dbms_output.put_line('Login Time  : '|| to_char(s.logon_time,'Dy HH24:MI:SS'));
  dbms_output.put_line('Last Call   : '|| to_char(sysdate-(s.last_call_et/60/60/24), 'Dy HH24:MI:SS') || ' - ' || to_char(s.last_call_et/60'990.0') || ' min');
  dbms_output.put_line('Lock/ Latch : '|| nvl(s.lockwait,'NONE')||'/ '||nvl(p.latchwait, 'NONE'));
  dbms_output.put_line('Latch Spin  : '|| nvl(p.latchspin,'NONE'));

  dbms_output.put_line('Current SQL statement:');
  for c1 in ( select * from sys.v_$sqltext
              where HASH_VALUE = s.sql_hash_value order bypiece) loop
    dbms_output.put_line(chr(9)||c1.sql_text);
  end loop;

  dbms_output.put_line('Previous SQL statement:');
  for c1 in ( select * from sys.v_$sqltext
              where HASH_VALUE = s.prev_hash_value order bypiece) loop
    dbms_output.put_line(chr(9)||c1.sql_text);
  end loop;

  dbms_output.put_line('Session Waits:');
  for c1 in ( select * from sys.v_$session_wait where sid = s.sid) loop
    dbms_output.put_line(chr(9)||c1.state||': '||c1.event);
  end loop;

--  dbms_output.put_line('Connect Info:');
--  for c1 in ( select * from sys.v_$session_connect_info where sid = s.sid) loop
--    dbms_output.put_line(chr(9)||': '||c1.network_service_banner);
--  end loop;

  dbms_output.put_line('Locks:');
  for c1 in ( select /*+ ordered */
          decode(l.type,
          -- Long locks
                      'TM''DML/DATA ENQ',   'TX''TRANSAC ENQ',
                      'UL''PLS USR LOCK',
          -- Short locks
                      'BL''BUF HASH TBL',  'CF''CONTROL FILE',
                      'CI''CROSS INST F',  'DF''DATA FILE   ',
                      'CU''CURSOR BIND ',
                      'DL''DIRECT LOAD ',  'DM','MOUNT/STRTUP',
                      'DR''RECO LOCK   ',  'DX''DISTRIB TRAN',
                      'FS''FILE SET    ',  'IN''INSTANCE NUM',
                      'FI''SGA OPN FILE',
                      'IR''INSTCE RECVR',  'IS''GET STATE   ',
                      'IV''LIBCACHE INV',  'KK''LOG SW KICK ',
                      'LS''LOG SWITCH  ',
                      'MM''MOUNT DEF   ',  'MR''MEDIA RECVRY',
                      'PF''PWFILE ENQ  ',  'PR''PROCESS STRT',
                      'RT''REDO THREAD ',  'SC''SCN ENQ     ',
                      'RW''ROW WAIT    ',
                      'SM''SMON LOCK   ',  'SN''SEQNO INSTCE',
                      'SQ''SEQNO ENQ   ',  'ST''SPACE TRANSC',
                      'SV''SEQNO VALUE ',  'TA''GENERIC ENQ ',
                      'TD''DLL ENQ     ',  'TE''EXTEND SEG  ',
                      'TS''TEMP SEGMENT',  'TT''TEMP TABLE  ',
                      'UN''USER NAME   ',  'WL''WRITE REDO  ',
                      'TYPE='||l.type) type,
       decode(l.lmode, 0'NONE'1'NULL'2'RS'3'RX',
                       4'S',    5'RSX',  6'X',
                       to_char(l.lmode) ) lmode,
       decode(l.request, 0'NONE'1'NULL'2'RS'3,'RX',
                         4'S'5'RSX'6'X',
                         to_char(l.request) ) lrequest,
       decode(l.type, 'MR', o.name,
                      'TD', o.name,
                      'TM', o.name,
                      'RW''FILE#='||substr(l.id1,1,3)||
                            ' BLOCK#='||substr(l.id1,4,5)||' ROW='||l.id2,
                      'TX''RS+SLOT#'||l.id1||' WRP#'||l.id2,
                      'WL''REDO LOG FILE#='||l.id1,
                      'RT''THREAD='||l.id1,
                      'TS'decode(l.id2, 0'ENQUEUE''NEW BLOCK ALLOCATION'),
                      'ID1='||l.id1||' ID2='||l.id2) objname
       from  sys.v_$lock l, sys.obj$ o
       where sid   = s.sid
         and l.id1 = o.obj#(+) ) loop
    dbms_output.put_line(chr(9)||c1.type||' H: '||c1.lmode||' R: '||c1.lrequest||' - '||c1.objname);
  end loop;


  dbms_output.put_line('=======================================================');

END;
/

undef 1